Friday, September 2, 2011

Sneak Peek!

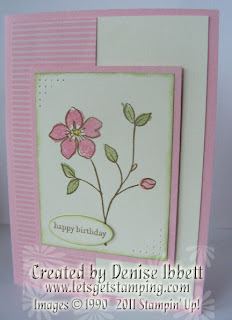
Here's a little 'Sneak Peek' at our class projects for this weekend...


There are still places available for the following classes so book in now...

Quick Cards - Sunday 4th September, 10 - 11.30am, $12
Techniques - Sunday 4th September, 12 - 2pm, $15

Thursday, September 1, 2011

Yay! The NEW Catalogue Is Here


Yay! The NEW 2011-2012 Stampin' Up! Idea Book & Catalogue is now available and there are lots of fantastic new products and a new set of In Colours to play with.

You can order from today, so contact me to place your order.

Catalogues are also available - RRP $15.95
(or get yours FREE when you host a workshop)

As you can see, Abby has already been enjoying my catalogue - you will too!!

Monday, August 1, 2011

Retiring Products....

From the 1st August Stampin' Up! publish their 'Retiring List'.
Hundreds of products will not be in the next catalogue (out 1st Sept.) so this is your last chance to purchase them before they are gone!

Products are only available while stocks last.... Some products are discounted so hurry!

 Click Here to see the retiring list.

Contact me to place an order or for the latest product updates! 

Sunday, July 3, 2011

Fancy Purse

This is a really easy little 'mini purse' that I taught recently and a workshop and Fancy Folds Class.
It's made fron a 6x6 piece of DSP. At the front the embellishment is punched out using the Boho Blossoms Punch, then the purse is fastened at the back with a Jumbo Brad and cute bow.
It's great filled with a few Hershies Kisses!

If you would like to learn how to make projects like this contact me for details about classes wnd workshops.


Friday, June 24, 2011

Diamond Fold Card

This is a great Fancy Fold Card that we made in a recent class. It springs up and folds out flat. You can decorate the diamond on top in any way you like - I stamped images from 'Party Hearty' and punched them out.

If you would like to book in for a Fancy Folds Class e-mail me - denise@letsgetstamping.com

Thursday, June 16, 2011

Another 'Sail Away' card! This is a single stamp and has been great value for me because I've used it so often.
I recently saw another beautiful card using this set that I'm planning to re-create for my next Techniques Class, so keep your eyes open for it as it might appear here in July....

Tuesday, June 14, 2011

Scrapbooking Class

This is a 12x12 latout I taught recently in a scrapbooking class. The weaving was really easy and lots of fun to do. 

I coloured a paper flower using classic ink pads and sponge dawbers, then added some pearls to embellish the centre. 

If you would like to book into a class check out the 'Classes' link for details and e-mail me to reserve a place.

Sunday, June 12, 2011

A Crafty Weekend

It's been a busy weekend manning our Stampin' Up! stall at Dunkley's Carft Show, but it was a great weekend and was good to see so many new faces. Hopefully I'll see you again at a class or workshop soon....
This is a project I designed recently for a workshop, and we also made it in a Quick Cards Class. It's a lovely card but also simple to make - using the 'Flower Fancy' Set with Two Step Stamping it's easy to add colour to your stamped images.

Check back regularly for more projects and ideas....

Sunday, April 24, 2011

Loads of Eggs

How do you make easter cards without an easter stamp set?

You dig out your Loads Of Love set! This is a card we made at a workshop I held as a fundraiser for a local playcentre. I wanted to use colours that would be fine for both boys and girls so I chose Perfect Plum, Marina Mist and Certainly Celery.

If you would like to know more about hosting a fundraising workshop e-mail me for details

Saturday, April 23, 2011

Cute Cards

Here are a couple of cute little easter cards. They are really quick to make and you can use any foil wrapped shape as long as it has a flat back - I used santas last christmas.

Give it a try yourself...

Friday, April 22, 2011

Happy Easter

I love making bag toppers at this time of year - they are a perfect way to liven up some mini Easter Eggs and it makes a great gift.I used Easter Egg stamp from Loads Of Love Accessories, and the greeting from Teeny Tiny Sentiments.

I also used my new Buttons Embosslet from the new Autumn-Winter Catalogue to make some co-ordinating buttons. A added Crystal Effects to make them glossy. What a great wat to make your own buttons to co-ordinate with any project.

Friday, April 8, 2011

Clean & Simple

For this clean, simple card I used my 'Sail Away' stamp again with Marina Mist on Whisper White cardstock.
It's difficult to see in the photo, but the image is framed top and botton with score lines. The taffeta ribbon and greeting from 'Stem Shillouettes' finishes it off.

Wednesday, April 6, 2011

Cheep!

With all the Easter goodies in the shops you can't help but notice that Easter in on the way. I don't have an Easter stamp set so I decided to use my punches to create this cute little chick. I've used him on a card and also on a little treat box (see below).
I've also used my new 'Framed Tulips' Textured Impressions Embossing Folder, which has just been released in the new mini catalogue. The effect can be quite subtle, but it really pops up when you sponge ink as I have done for the grass.

Monday, April 4, 2011

Eat Chocolate!

When I saw the new 'Eat Chocolate' set in the new Autumn-Winter mini catalogue I just couldn't resist it - right up my street! I make lots of little gift boxes and most of them end up with chocolate in them, so this set will get lots of use. 
This chocolate pouch is my first project with the set. Admittedly the photo would have looked more effective if I had put a bar of chocolate in the pouch but chocolate doesn't last long in my house, so you'll have to use your imagination!
I inked up the stamp using Wild Wasabi and Real Red markers and it fits perfectly in the scallop oval punch.

Try it out yourself! Check out the set in the Autumn-Winter mini catalogue and e-mail me to place your order.


Friday, April 1, 2011

The Autumn-Winter Mini Catalogue OUT NOW!

Ohh, this is what I've been waiting for... some gorgeous new products to play with!

Click on the Mini Catalogue link on the right to view the catalogue online, or e-mail me to request your copy.

Here's a card I made using one of the single stamps - Sail Away ($17.95). It is great for cards for any occasion, especially for the men in your life. The image looks great as it is, but it's also great for water colouring.

I've already made three cards using this stamp, one of which I will be teaching at my Quick Cards class on Sunday 3rd April (though not the one pictured here - that one will be a surprise!).

To book into a Quick Cards class e-mil me - denise@letsgetstamping.com 

Sunday, March 27, 2011

5 days to go...

Just five more days left to claim your FREE Sale-A-Bration set!
Spend $120 before the 31st of March and choose one of four great sets (click on the 'sale-a-bration' link on the right for more details)  

I used 'So Happy For You' to add the sentiments to this card. It fits inside the HodgePodge Hardware perfectly (with a bit of trickery!) I love 'So Happy For You' as the font size is just right - not too big, not too small - and the font style is great for any occasion. 
For this card I embossed velum and adhered it to coloured cardstgock - I think this gives the flowers a lovely translucent finish and the Hodgepodge Hardware adds a little finishing touch.
To learn how to make cards like this, register for one on my quick cards classes.

Friday, March 25, 2011

Time's almost up!

This is a cute little box we recently made in my Fancy Folds Class using the Bliss Set (Sale-A-Bration) and the Bigz Clear Scallop Square Die (Summer Mini Catalogue).
Both Catalogues end on the 31st of March, so get your orders in ASAP

If you're interested in learning to make projects like these, e-mail me for more information about Fancy Folds classes or to book your place.

Tuesday, March 22, 2011

Colour Confidence

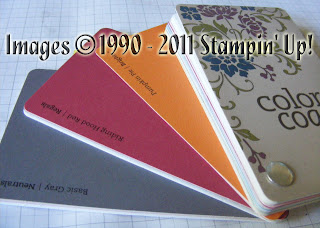
This is a colour combination I would normally never have been brave enough to choose - Riding Hood Red, Pumpkin Pie and Basic Grey - but it actually works!
Here's my secret.... I finally brought the Stampin' Up! Colour Coach and it's GREAT! It's been on my wishlist for ages and now I have it I don't know why I waited so long!
It's a bit like the colour charts you get from Dulux & Resene. There's a full size card for every colour (including In Colours) that you can use to compare colours, which is great. However, even better than that, on the back of each card there are 2 sets of colour suggestions. There are also some handy tips at the beginning of the pack to help you along the way.
I've used several on these suggestions now and they look great - a really good way to step out of your comfort zone with the knowledge that your card will still look great!

Friday, March 18, 2011

Join a Techniques Class

Below is a card I made recently using a technique from my latest Techniques Class.It's a quick 'direct to paper' technique that you can have some fun playing with and create some great effects for backgrounds.
There are currently spaces available in my Techniques Class. I teach 3 techniques, with instructions and a sample to keep. We then make a card using 2-3 of the techniques you have learned so you can see the ideas 'in action'

My next Techniques class is the 3rd April, noon-2pm, $15.
To book in e-mail denise@letsgetstamping.com

Wednesday, March 16, 2011

Sale-A-Bration Ends 31st March

Sale-A-Bration is almost over, this month is your last chance to qualify for exclusive FREE stamp sets
We made this card in a recent class using 'Punch Bunch' from the Sale-A-Bration brochure - each stamp in the set co-ordinates with a Stampin' Up! punch.
For this card I used the scallop square stamp and punch. I actually cased the idea from Shelli's blog. It's a really versatile design as it's great for male or female cards - just change the colours to suit.
The central strip has been crimped to add some texture and we used the 'Rock & Roll' technique to add both shades of blue around the edges of the scallop square.
Here's another version of the card I made using different colours. This one is destined for my cousin who is turning 18, so I added the numbers using my Big Shot and Simple Numbers Die.


Monday, March 14, 2011


Here's yet another brayered card. This time I embossed the daisies from Upsy Daisy using Concord Crush ink and clear embossing powder. I then brayered opposit corners with green and blue. I layered the image onto Concord Crush, Whisper White and Pear Pizzazz cardstock.


Why not gove it a try? Want to learn how to use a bryer? Book a workshop!

Saturday, March 12, 2011

Double the Treats

Yum... there's nothing better that a treat box that already contains treats!
I made this box using a Sweet Treats Cup, with a sliding door on the inside so you can enjoy the treats without destroying the box.
I used the Medallion stamp and Cute & Curly set and Elegant Soiree Designer Series Paper, all finished off with layers of punches and some Hodgepodge Hardware.

E-mail me to register for a Fancy Folds Class.

Wednesday, March 9, 2011

Choo Choo!

We made this card quite a while ago in a Quick Cards Class, but have only just got around to blogging it.
This was a really quick but cute card. I've used my 'Choo Choo' set and 'Right On Track' Wheel. I've used these on several cards but also have a great 12x12 layout in my head, so look out for it!

Monday, March 7, 2011

Digger Crazy

This is a brithday card I made for a little boy who is digger crazy. As I didn't have an appropriate stamp set I printed the image onto Whisper White cardstock from my computer.
I also used my new Simple Numbers Die with my Big Shot and the 'Rough Type' Alphabet from the current Mini Catalogue.

Colours are Real Red, Basic Gray and Whisper White.

Saturday, March 5, 2011

Here's another example of brayering. This is a card we made in one of my Techniques classes recently.
I used 'Lovely as a Tree', which has turned out to be such a flexible set.
I layeder the main image onto Concord Crush cardstock and then onto Whisper White, which I embellished using my Scallop Trim Edge and Scallop Trim Corner Punch.

E-mail me today to register for a techniques class to learn more techniques like this.

Wednesday, March 2, 2011

Free is Good!

Don't you just love freebies?! I used my new 'Bliss' set, which was free as part of Sale-A-Bration. I love this set and already have heaps of ideas for it.
This card was inspired by one given to me by Rachael Knight - check out her blog

Sale-A-Bration ends at the end of March, so get your orders in NOW to earn free sets.

Wednesday, February 23, 2011

My brayer has been getting a good workout lately. This is an idea I had after I taught brayering in one of my techniques classes.
I brayered the sky and sea, then sponged the sun. I used Basic Black to stamp the leaves and bird using my Vintage Vogue and Silhouette Sentiments stamp sets. The greeting comes from Teeny Tiny Sentiments and I also used my scallop trim border punch. 

Give it a try yourself!
If you're a little nervous about brayering why not book a workshop and I'll show you how....

Monday, February 21, 2011

Rough Type Goes Bright

I loved the Rough Type Alphabet as soon as I saw it in the Summer Mini Catalogue. At first glance I though it would be really great for scrapbooking and vintage projects, but it's so versatile that it works really well with bright and contemporary projects too!

It's also really easy to use this set as you don't need to worry about getting all the letters perfectly straight. It comes with the circle stamp that I used for 'happy', but if you have the clear mount set you can also line all the letters up on one block and stamp a whole word in one go as I did with 'birthday'.

Products in the Summer Mini Catalogue are only available until the end of March, so get your orders in soon...

Tuesday, February 15, 2011

Vintage Swing

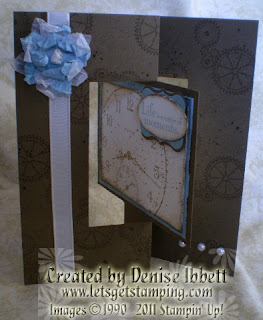
Here's the Swing Card (also known as a flip flop card) that we made in the January Fancy Folds Class.
As you open the card the middle section swings around as you can see in the second photo.
For this card I decided to play around with a more vintage style than usual so I chose 'Sense of Time', which is a perfect set for this style. We also used the spritzer tool (main catalogue) and some smooch spritz (Summer Mini catalogue). To finish it off there's lots of sponging and a crumpled, layered 5-Petal Flower using cardstock and velum.

Humm, I quite liked the finished result - I might go vintage more often!

If you have never been to one of my classes, reguster for any class in February or March and receive a $10 voucher.
If you've been before but bring a friend who hasn't been, you'll both receive a $10 voucher!!
Wow! E-mail me today - denise@letsgetstamping.com  


Sunday, February 13, 2011

Lucky Last

This is my last Valentine offering for this year - lucky Matt, there have been quite a few (see older posts below...)!

This is another card using 'Love Defined'. Boy I've got my money's worth out of this set. You can find it in the current Summer Mini catalogue.
For this card I use my Stampin' Write Markers to colour the main image and also the sentiment stamp.

Sets in the Summer Mini are only available until the end of March so don't wait - order today

If you would like to make cards like this then simply register for my Quick Cards class (click the 'classes' link above for dates)

Saturday, February 12, 2011

More Sale-A-Bration Inspiration

Here's another little card from the Sale-A-Bration catalogue that I couldn't resist casing. Again I have used 'Sweet Summer'. I also added a button and punched my Very Vanilla cardstock with the Spiral Punch, as well as embossing the background of the Pretty In Pink cardstock.

Friday, February 11, 2011

Valentine Treats

What could be better than receiving this cute little card from your Valentine?

Opening it up and finding chocolate inside of course!
 We made this treat holder in one of my recent Fancy Folds Classes using the 'Love Defined' Stamp Set from the current mini catalogue. It's the perfect size for a Whitrakre's Square - YUM! 

I punched out this little heart using my Owl Punch and then used a layer of Crystal Effects to give it a bit of extra gloss.

Umm, Lovely!

Thursday, February 10, 2011

Punch, Punch, Punch!

This is a simple but effective card that doesn't involve a whole lot of stamping but lots of punching! Luckily the new style punches are a breeze to use. For this card you will need the Owl Punch to punch these perfect circles and hearts.  
We made this card in a recent class for Valentngines Day, but I originally made it as an anniversary card using my Teeny Tiny Sentiments set to stamp the greeting. I have also since used the same idea to make an engagement card.
As you can see from the close up shot below I'm still addicted to those Pearls, but this one also looks great with a bit of *BLING* so add a Rhinestone if you want!